Monday, November 4, 2013

Chicken and Orzo Soup


     Fall is here, and one of the things I miss most about home are the bright yellows, oranges and greens of the trees. Some of my favorite memories are of walking through BYU campus, thousands of brightly colored leaves lining the sidewalks. This soup brings me a little closer to home. It is absolutely beautiful. All the colors of the vegetables really make this soup pop visually. The chicken and pasta together are hearty, and the thyme and corn add a little bit of sweetness. So if you're in the mood to make this season a little more nostalgic, this soup is a great way to do it. 
     This recipe is fast, and stands great on it's own. So, put away your sour cream and cheese, because this honestly tastes better without it. Also, if you have never used Orzo pasta before, you are in for a treat. It is small, and shaped like a grain of rice, so you can have a hearty "noodle soup" taste without the mess that comes along with longer noodles.
 
Recipe:
1 tsp. Oil
2/3 C. Diced Carrots
1/2 C. Diced Celery
1/2 C. Diced Onion
1/4 tsp. Salt
1/8 tsp. Pepper 
1/2 tsp. Thyme
1/2 tsp. Parsley
2 Breasts Diced Chicken (About 2/3 lb.)
4 C. Chicken Broth
1 C. Water
1/2 C. Uncooked Orzo Pasta
1 C. Corn
2-3 C. Baby Spinach
1 T. Lemon Juice

Step 1: Dice your vegetables and chicken. 
(*Tip: I have found this soup is easier to eat if the ingredients are similar sizes. Try to avoid having large chunks of chicken, medium sized slices of celery mixed in with all the naturally smaller bits. Keeping everything small also helps to evenly distribute the flavors, so every bite is balanced.)

Step 2: Heat the oil in a pan (I prefer olive oil) and saute the vegetables with the spices.

 Step 3: Add chicken. 
(*Tip: If you are using raw chicken, you can saute it at the same time as the vegetables. It helps cut down on dishes if you do everything in the same pot. Personally, I like to use a rotisserie chicken, because it has a better texture, and adds a little more flavor.)
 Step 4: Add broth, water, orzo and corn.
 Step 5: Bring to a boil and then let simmer for 20 minutes.

Step 6: Just before serving, add the baby spinach and lemon juice. Let it cook just enough to wilt the spinach leaves.

Step 7: Serve and enjoy!
(*Tip: A little trick I learned while serving soup. If you fill the ladle up 2/3 full, then double dip the ladle, the surface tension of the soup will pull any drips off the bottom. This prevents you from dripping across your table, or counter as you fill up your bowls! Amazing huh!)

Monday, October 14, 2013

Personalized T-Shirt

I have wanted to make personalized T-shirts for a while now. My good friend Mighty and I got together to make them, and OH MY GOODNESS!!! They were so cute! It was so much easier than I thought it would be.

Supplies
pattern
iron on interfacing
iron on adhesive
fabric
embroidery floss
shirt

Step 1: Print out your template. I used a font named "Archistico". You can find the free font download here.
Tip* Depending on the size of your shirt, you will want to adjust the size of your font. Once you print it, hold it up against your shirt to make sure it's the right size.


Step 2: Trace the lettering onto your interfacing.
Tip* I used an iron on non-woven interfacing. The thinner, the better.

Step 3: Iron your interfacing on to a scrap of fabric.
Step 4: Cut out your letters.
Step 5: Iron your letters onto an iron on adhesive strip. Here is an example of what to buy. Iron on adhesive.
You can tell my spacial reasoning skills aren't all that great. I thought it would come out correct, but nope. It's backwards. Peel off the paper backing and you can stretch the adhesive off from around the letters.
Step 6: Prepare your T-shirt. Remove stickers, tags, etc...
Step 7: Place your letters in the desired spot on your shirt, then iron them on.
Here is what my shirts looked like at this point. They look cute, but the adhesive won't stay permanently so you'll have to do a little bit of hand stitching at this point to anchor them on.
Step 8: Using embroidery thread that matches your fabric, tie a double square knot at the end of your thread.
Step 9: Begin on the outer edge of the first letter and pull your thread through about 1/8th of an inch away from the edge. Just enough to catch the fabric, with a little extra showing on the outside.


Monday, September 30, 2013

Water storage- How much water do I need?

      Every year, My church organizes a "Provident Living Expo". It's an event meant to help families in my area prepare for emergencies. Three years ago, I was asked to put together a booth on water storage.
     At the time, there were several wildfires sweeping through the area, cutting off freeway travel and burning down homes. To top it off, the state was also in a severe drought. In fact it was so bad that Governor Rick Perry organized a statewide fast to pray for rain. I'll admit, people were a little more concerned about water storage then.
     I put together a pamphlet covering all the basics on water storage and passed it out at my booth. I guess I did an okay job because I've been asked to run the same booth for three years in a row. As the expo just came to a close this year, I thought "Hey! This would be a great blog series." So, if you're looking for where to begin when it comes to water storage, you're in the right place. And don't worry--- I'll keep it simple! First up...

How much water do I need?
The red cross recommends that you store 2 weeks worth of water for your family.

You'll need 1 gallon of water per day, per person.
So, to figure out how much you need, here is a handy dandy family worksheet! Print it out, and stick it somewhere to remind you to get it done!


One gallon per person will be enough for drinking and food preparation.  

If you want water for personal hygiene purposes or pets, you'll need to add additional storage. (You can cut down on water needs by storing baby wipes. That way you can give yourself sponge baths instead of having to store large amounts of water.)

One of the most important things about water storage is, if supplies run low, never ration water.  Drink the amount you need today, and try to find more for tomorrow.  Minimize the amount of water your body needs by reducing activity and staying cool.

I hope this motivates you to get started in your emergency preparedness. Just take it one step at a time, and before you know it, you'll be ready for whatever may come!

Monday, September 16, 2013

Sportsmanship for 3 year olds...

     Lately it seems like my life has revolved around Candy Land, Go Fish, and Connect Four. Little L has a little competitive streak that makes me laugh, unless I win, which means I'll be dealing with a meltdown. For a while, I thought it would be easier to let him win consistently. Tantrum avoided + game enjoyed = success. This was an okay idea until he started to play games when his friends came over. The instant he realized he didn't win, he lost it. That's when I realized that I  had been missing out on teaching opportunities by always letting him be the winner. Not to mention he had an inflated sense of how good he was. I decided it was time to stop being so easy on him.

    I don't mean that I'm going to crush him every time we play. (I know that sounds pretty confident on my part, but face it, Mommy vs. 3 year old... It's pretty obvious who's going to win.) So, here are some strategies I've discovered to help me continue to have fun with my toddler, while giving him the opportunity to be a better sportsman.

Here are some ideas:

1. Give your child a head start. Everyone will have more fun if you are trying your hardest to win. If you are racing, let them start closer to the finish line. If you are playing Go Fish, give them a target amount of matches, and give yourself a higher target. Get creative!

2. Celebrate winning, without making other players feel inferior. I hate winning against sore losers. It totally detracts from my victory. Success story: Picture this; me and 2 three year olds battling it out on Candy Land. L's friend was totally dominating the game and his face grew more and more desperate, full of hope that he would pull some last minute maneuver and take the victory. I was more worked up than him, wondering how I could avoid the inevitable meltdown at the end of the game and not downplay the victory for his friend. The inevitable victory happened and, before L could react I shouted "You made it! Hurray! Now everyone run to the castle! We have to make it to his party!" The friend was excited that the party was in honor of him, and L felt like he got to participate in the rewards of the victory. Which ultimately, isn't that why we all play games? To enjoy ourselves?

3. Show children how to recognize their strong points, even if they lose. Children soak in compliments like a paper towel. If you continually compliment them on achievements during the games, it's easy to reiterate them at the end of the game, and take the focus away from the loss, and focus more on the accomplishments. "I can't believe you tricked my queen like that! That was so clever!" or even "Wow, you are getting so much better at this!"

4. Model good behavior. Offer continuous praise throughout the game to other players. Show that you can have fun without having to be the best.

5. Role Play it up! A little bit of acting can go a long way and be an effective way to prove a point. If you have an older child or adult playing with you, you can show them Exhibit A: vs. Exhibit B. Ask them which friend they would like to play with, the sore loser or the congratulatory friend.


Monday, September 9, 2013

Felt Food Tutorial: Pizza Crust

Have you ever noticed how much kids love to bite play food? Occasionally, I'll see a little girl politely pretend to nibble, but my boys are a whole other story. Often their vivacious gnawing leaves me wondering why they can't be so enthusiastic over dinner?
We've tried plastic food, but it only takes a few minutes before it is peppered in permanent teethmarks. For some reason, my kids don't find the food as appealing after that... I was frustrated with this when I discovered FELT FOOD! What a great idea! It's easy to wash, keeps it shape, and most importantly it's incredibly cheap to make! I have thoroughly enjoyed making felt food, so I thought I would include tutorials for some of my favorite pieces.


Pizza Crust Tutorial

Step 1: Cut out two circle shapes out of felt. One eight inch in diameter, and one 6 1/2 inch in diameter.
Step 2: Cut each of your circles into quarters.

Step 3: Set aside your 8 inch circle quarters, this will be the bottom of your pizza crust. Using your 6 1/2 inch circle as a guide, cut a 2 inch strip of felt. These two pieces will be the top of your pizza.

By now you should have an assortment of pieces that look like this.

 Step 4: Sew the rounded edge of the large triangular shape to the rounded outside edge of the crust. 
(I used dark colored thread so you could see what I was doing, but I suggest using a matching thread that you won't be able to see so easily. Or, if you like the crafty look of the hand stitching, I would suggest using an embroidery floss.)

I used a blanket stitch, because it allows for better shaping.


Here is another view of what it will look like.
 Step 5: Attach the small triangular shape to the crust. This time, the seam will be on the underside of the felt. This will give it the right shape once you put everything together.


 Step 6: Cut out a piece of felt that is just a bit smaller than the base piece and insert it into the crust. This will give it a little bit of density, and make it more firm.
(I used blue for contrast, but only for tutorial purposes. Try to use a similar color for your filling, because anything this dark will show through and make your felt look tinged wrong.)
 Step 7: Cut out gradient pieces of felt for the crust. About 3 should do.
 Step 8: Fold down the top of the crust and fit snugly onto the filling.
 Step 9: Begin hemming along the thin part of the crust, working from the crust and going in towards the point. This will prevent it from bubbling up.
 Step 10: Once you have made it to the point, continue up the other side until you get to the crust again.
 Step 11: Next, do a basic stitch to hold down the center of the pizza crust to keep things from shifting.
Here is a view of what it will look like on the bottom.
Once you get to the end, here is a little trick: take your needle, and thread it into the middle of your fabric...


Poke out the point about an inch into the fabric, and pull it all the way through.
You will have a tail of thread coming randomly out of your crust.
Now snip the thread and it will disappear into the center of your crust. That way, you don't have any tail ends poking outside of your piece of pizza!
Step 12: Cut two shapes to fit the ends of your crust.
Step 13: Blanket stitch around the ends and tuck the threads in, using the little trick I showed you.
And here it is! Your finished product!


Monday, September 2, 2013

Brazilian Beans and Rice


My husband and I love Brazilian food. This simple Brazilian staple is one of our family favorites. My husband lived in Sao Paulo while serving as a missionary for our church, and ate this almost every day for two whole years! This beans and rice meal is flavorful and EXTREMELY filling! A little bit goes a long way when dishing up, so make sure to go easy on the portions! 

We make this meal almost weekly in our home, for a number of reasons. 
1: It is SO easy! 
2: It is extremely healthy. We can testify to it's weight loss powers!
3: It is cheap, cheap, cheap! 

In fact, I did the math. To feed 2 adults, here's a basic breakdown:
$ 0.30 Beans 
$ 0.66 Rice 
$ 0.75 Onion 
$ 0.10 Garlic

Total: $01.81!

That's it!


Rice Recipe
1 T. Olive oil
1/4 C. Sweet onion, chopped
1 C. Rice (I use a brown Basmati rice, but you can use whatever you prefer.)
1/4 tsp. Salt 
2 C. Water 

In a large pan, saute onion in oil until translucent. Add rice to the pan and toast until the grains of rice turn white. *Tip: If the rice turns brown, you have fried it too long. Add salt and water, then bring to a boil. Cover and reduce heat to low. Cook 30 minutes for white rice, and 45 minutes for brown rice.

Beans Recipe
1 tsp. Olive oil
1 Clove garlic, minced 
2 C. Pinto beans, pre-cooked and rinsed
1 C. Water
Dash Pepper
1/4 tsp. Salt

Saute garlic in oil, then add beans, water and spices. With the back of a spoon or ladle, begin to smash some of the beans into a paste and stir into the water. *Tip: I typically smash 1/3 of the beans and leave the other 2/3 whole. As the beans continue to cook, they with thicken and have a nice thick consistency. 

To serve, layer rice first, then cover with beans. Top off with 4 oz. of meat or fish. Brazilians don't eat a lot of meat, it is only there for a bit of flavor. My husband and I usually split a small chicken breast, or filet of fish. It looks small, but believe me, it's enough! You can also serve it with a side of herbed bread or steamed vegetables.

Well, there you have it! I hope you enjoy!  

Monday, August 26, 2013

Creating a Personal Cleaning Schedule

Being a homemaker is a big job. Between caring for a family, keeping a house, and finding time to for ourselves, face it ladies and gents, we are busy people. Fortunately, being a mother and keeping a house is something that I've always dreamed about. It's something that I love talking about, because I know there are a million and one ways to run a household. I am always open to new ideas about how to be efficient in my job. While talking with a good friend about a year ago, she recommended that I come up with a cleaning schedule. 

I had honestly never heard of a cleaning schedule before. I mean, wasn't it obvious what needed to be done around the house? I had never thought about scheduling my duties. Well, I thought I'd give it a try and let me tell you, it has been some of the best advice I've ever gotten! Since I started using a cleaning schedule, I've noticed some SERIOUS benefits. But first:

What exactly is a cleaning schedule?

A cleaning schedule consists of you, sitting down and deciding what things need to be done on a weekly basis in your home. Here is an example of what mine looks like.

First, I made a few daily rules. These make sure that the house is always guest ready. 
Next, I decided what chores I actually need done on a weekly basis. Of course there are going to be extra things, like vacuuming the crumbs out of the couch, but I can take those things as they come. With this chart, I know that these things that need to be done once a week.

Okay, now to the fun part: the benefits!

#1. It keeps me from cleaning all the time.
I don't know about you, but if there is something that needs to be done in my house, I have a hard time sitting still. Having a schedule gives me permission to let those extra things go. If my scheduled jobs are done, then I can relax. So instead of putting in that single load of laundry sitting in the white's hamper, I can wait till laundry day, and go outside with my boys instead.

#2. It keeps me from doing the same things over and over again.
My first apartment in Texas was big, it was beautiful, it was WHITE! It was nearly impossible to keep clean! The kitchen counters were my worst nightmare. They soaked in every color that they came in contact with, and I found myself bleaching them daily to keep them looking nice. Once I started following a schedule, I realized that I was spending so much time bleaching the crazy counters that I wasn't doing other much more important chores (like making sure my husband had clean socks for school the next day...) It helped me recognize what chores I obsessed over, and helped me find a healthy balance between my obsessions and what actually needed to be done.

#3. It keeps me from getting caught up in obscure projects when the basics haven't been done.
I love to organize--- drawers, closets, bins, every possible nook and cranny. I love when things are folded nicely, lined up and coordinated. Sometimes I'll get an urge to pull everything out of a drawer, place it to perfection, and forget that the dishes aren't done, the laundry hasn't been folded and the carpet REALLY needs to be vacuumed. But hey, that pen drawer sure is pretty dang near perfect. The unfortunate thing about this is that when the husband walks home, he doesn't immediately notice the perfect pen drawer, but he does see the dishes...  I've noticed that my husband compliments me more often on the housework when I stick to my schedule. (I guess that could be considered Benefit #4 in it's own way.)

#4. Nothing ever gets too dirty. 
I suppose one of the main theories behind a cleaning schedule is that, nothing ever goes too long before it gets cleaned again. I find that each week, it takes me less time to complete my scheduled jobs, because things are still put together from the previous week. No more scrubbing off three weeks of hard water buildup. It really does give my home an overall feeling of order and cleanliness. Try it, you'll see what I mean!

#5. It helps my family develop habits of cleanliness.
My little boy, even though he's only 3, knows the ropes. Eat dinner, brush teeth, put on pajamas, pick up his room, read a bedtime story, say prayers, then go to sleep. Quite simply, cleaning has become as important to his bedtime routine as any of the other steps. If we miss out on it, he insists on making it happen. I love to think that he's developing habits of cleanliness that will stick with him his whole life. 
 
I hope you enjoyed this post, and I'd love to hear about any extra benefits you find from keeping to a schedule!

Monday, August 19, 2013

Taming the Television


Television is one of the hardest things to regulate in my home. If I'm not careful, it can completely take over my day. When I was pregnant I'll admit, Pixar, Disney, and PBS were my best friends. But get ready kids! We're breaking the bad habits.

Why Bother?

It's no secret that television can have a dramatic affect on children. A recent study found that kids who watch more than 2 hours of TV a day show a decrease in 
  • vocabulary skills
  • math skills 
  • classroom engagement 
  • attention span 
  • physical prowess
  • and are more likely to be victimized by classmates.
That's pretty drastic! What parent wouldn't want to help prevent that? When I did a personal inventory of our family screen time, I realized that most days I fall above the recommended 72 minute limit. Perhaps I didn't notice because I justified that we were watching mostly educational programming. But pure and simple, television is a passive activity. Observing life is not nearly as productive as living it. In short, TV is no substitution for hands on learning.

How Do I Start?

Take a survey. 

A great way to start is to survey your family television time. Fill in hour by hour what your family watches. It's like counting calories, you might be surprised by what you find. It will also help you realize exactly how much TV you are going to have to cut out of your daily schedule.

Set rules.


Involve your kids when setting limits. Ask them about what they think is important. They can help you determine what the rules should be. Before you begin enforcing the rules, prepare some alternative activities to help prevent a power struggle during TV "off" times. Finally, remember that modeling is one of the best ways to justify rules. If you have your own personal television rules, it will them understand that you're not trying to be oppressive, but healthy.

Healthy Viewing Habits

Once you've got the rules down, now you can star to refine your viewing habits. The following suggestions are ones that have proven to decrease the negative affects of television on children.

Watching TV together:
 
Talk about what you watch. The other night, a Victoria's Secret commercial came on. We could have quietly changed the channel and left it at that, but we decided to use it as a teaching opportunity. Even though Little "L" is too small to understand, we covered his eyes.

"Oh no! They are not being modest! Everyone close their eyes!"

At first he resisted, until he saw me and my husband doing it ourselves. After that, he was happy to participate. If we hadn't been there watching with him, we would have missed that opportunity.


TV Talk

Children are exposed to a lot of good and bad through television. Sometimes violence, immoral behavior, stereotypes, and bias can sneak into their programming. As adults, we can easily determine what to think about these exposures, but children have difficulty distinguishing realistic behavior from irrational action. TV time can be an opportunity to discuss values with your children. Look for the following issues and talk about them.
  • Expose the values portrayed in programming. For example: do characters value their peers more than their family?
  • Point out violence. Talk about how serious this kind of behavior is in real life. 
  • Counter stereotypes. Discuss issues such as prejudice and judgement.
  • Look for political and social bias. Maybe characters use emotionally loaded words, trying to give positive or negative connotations.

TV and Mealtimes

Mindless eating is a real problem; and lets face it, television doesn't help. Most commercials advertise high sugar snacks, fast food and other low nutrition items. Studies have shown that these kinds of commercials have a huge impact on children's food preferences and actually increase their caloric consumption. The best way to combat this is to not let television disrupt mealtimes. When you eat dinner as a family, you can reinforce ideals of healthy living. 

(Click here for an article on the effects of TV on youth diet.)


TV Free Week

Try a family experiment and unplug the TV. You can choose to do it for a couple of days, or even a week, but make a determined commitment to avoid it completely. This used to be easier, before everyone had an I-phone in their pocket and a tablet sitting on their nightstand, but you can do it! With a little bit of planning, you can turn it into a fun family adventure. Here are a few ideas to help you:
  • arrange family activities in the evening
  • go to the library
  • buy new board games
  • take walks, get outside
  • choose a hobby or craft to work on together
You can find all sorts of productive and fun activities to do as a family. I'll admit, it is going to be hard, but, once your time is through, you'll be amazed at how productive you were, and how much fun you had. You could even challenge yourself to make a better rule about how much television to watch. 

Tuesday, August 13, 2013

Earring Travel Book

When I first had my ears pierced, I did not have a good place to keep my earrings. They ended up in drawers, on the night stand, underneath the bed... Everywhere! One night, I saw a picture of an earring travel book online and thought "I have to make this!"


I have to say, this project was great. It cost less than three dollars to make, and took about half an hour to put it all together. I originally thought I would just use it when I went on vacation, but now, I use it exclusively for my earrings.

I was able to buy everything I needed for this booklet at Hobby Lobby. For the pages, I bought pre-cut sheets of felt that come in 9x12 squares. You will find them in the crafting portion of the store, not with the fabric. Also, I like to use the stiffened felt for the cover, and the softer felt for the pages. 

I punched miniature holes through the pages of my felt to give the earrings an easy, designated spot to slide through. I used a scrap-booking eyelet kit to do it, and it worked great. I've included some written and illustrated instructions for it's construction. I hope you find them helpful!


Supplies:
2 sheets of colored felt
1 sheet stiffened felt
Matching thread
Adhesive Velcro dot
Hammer and eyelet setting tools
Hot glue gun

Patterns:

Cut the two colored felt squares into quarters.


 Cut the stiffened felt into the following shapes.


Instructions:


Saturday, August 3, 2013

Simple and Soft Wheat Bread


Hot, homemade whole wheat bread--- is there anything more welcoming? As a young girl, I used to watch my mother make this recipe. The image of her allowing her youngest helpers spoon in the ingredients makes me feel at home. While making it this week, my first instinct was to get my three year old and hand him the measuring cups. We had a great time together, and he was so proud to eat the bread "he" had made.

That's the wonderful thing about this recipe. It's so simple that kids can help. Not only that, but it's amazingly good. Most people have a hard time believing it's whole wheat. It is soft, it doesn't crumble, the crust is thin, and the texture is SO smooth. 

That's because my bread has a secret. It's something my mother discovered after producing a few loaves of "bricks" as she so lovingly called them. Don't worry, I'm not planning on keeping you in suspense. In fact, this secret NEEDS to be shared! This secret ingredient--- is called Vital Wheat Gluten. You can buy it in just about any grocery store. Without it, you'll get a typical loaf of wheat bread. Crumbly, heavy..... Not a family favorite. With it, this bread practically melts in your mouth. 

Recipe:

3 C. Warm Water
1 T. Yeast
1 T. Salt
1/3 C. Vital Wheat Gluten
3 T. Oil
1/3 C. Honey
7-8 C. Whole Wheat Flour 
 
I like to start at the very beginning; grinding the wheat. If you don't have a grinder, you can buy whole wheat flour already milled, and it doesn't make too much of a difference. My favorite wheat to use for bread is hard white wheat.  
Tip: The higher the protein content, the better loaf it is going to make. 
When grinding wheat, it is a 1:1 ratio. So, 1 cup of wheat berries, is going to make 1 cup of flour.

 Next, gather your ingredients.
Tip: Water temperature should be hot enough that your finger is uncomfortable.


Pour all ingredients (except flour) into a mixing bowl and whisk. Once they have all been combined, add 3 C. of flour and continue to whisk. 


From here, you won't want to use the whisk any more. The dough will be getting thicker quick. I don't have a full scale mixer, so I just use a bread hook attachment on my hand mixer. It works pretty well, but I'm definitely pining for something a little more heavy duty. Ahhh... Someday.


One cup at a time, begin adding the remaining flour. 


Keep adding it until the dough no longer sticks to the side of the bowl and isn't tacky when you touch it with your fingers.


Split the dough in half and turn one portion onto a well floured surface. I like to turn it over a few times if it's still a little sticky, to coat the surface with flour.


Roll the dough out into a long rectangular shape. Once it is flattened out, roll it up like a cinnamon roll, and pinch off the ends. Most people don't do this, but I've found it's a pretty fail-safe way to get a beautiful loaf of bread. Another reason I like this method is because it rolls out all the little air bubbles that are left over in the dough. That way you don't get any gaping holes in your slices.


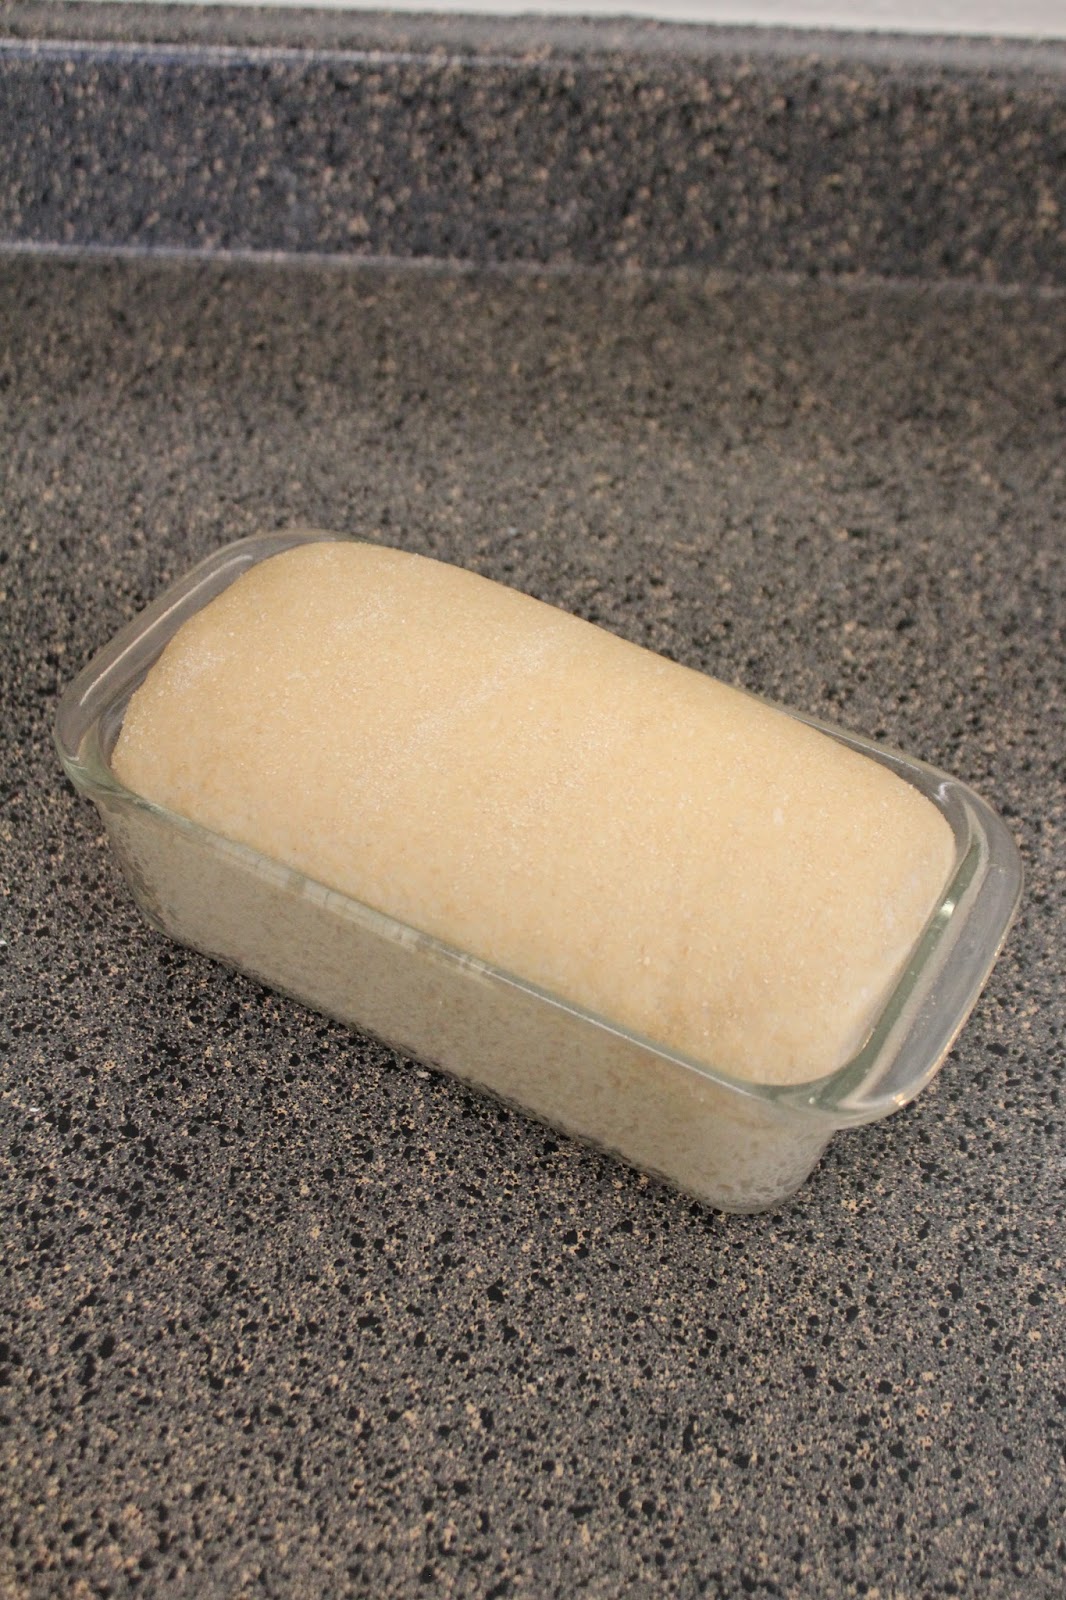
Place your dough roll in a greased bread pan, and set in a warm oven to raise for one hour.  
Tip: Don't let the oven get over 100 degrees, or else it will give you a really thick crust.


See how nice and smooth it has risen up to be!


Next, bake at 350 for 30 minutes. Remove from the bread pan to cool or serve warm. Enjoy!