I have wanted to make personalized T-shirts for a while now. My good friend Mighty and I got together to make them, and OH MY GOODNESS!!! They were so cute! It was so much easier than I thought it would be.
Supplies
pattern
iron on interfacing
iron on adhesive
fabric
embroidery floss
shirt
Step 1: Print out your template. I used a font named "Archistico". You can find the free font download here.
Tip* Depending on the size of your shirt, you will want to adjust the size of your font. Once you print it, hold it up against your shirt to make sure it's the right size.
Step 2: Trace the lettering onto your interfacing.
Tip* I used an iron on non-woven interfacing. The thinner, the better.
Step 3: Iron your interfacing on to a scrap of fabric.
Step 4: Cut out your letters.
Step 5: Iron your letters onto an iron on adhesive strip. Here is an example of what to buy. Iron on adhesive.
You can tell my spacial reasoning skills aren't all that great. I thought it would come out correct, but nope. It's backwards. Peel off the paper backing and you can stretch the adhesive off from around the letters.
Step 6: Prepare your T-shirt. Remove stickers, tags, etc...
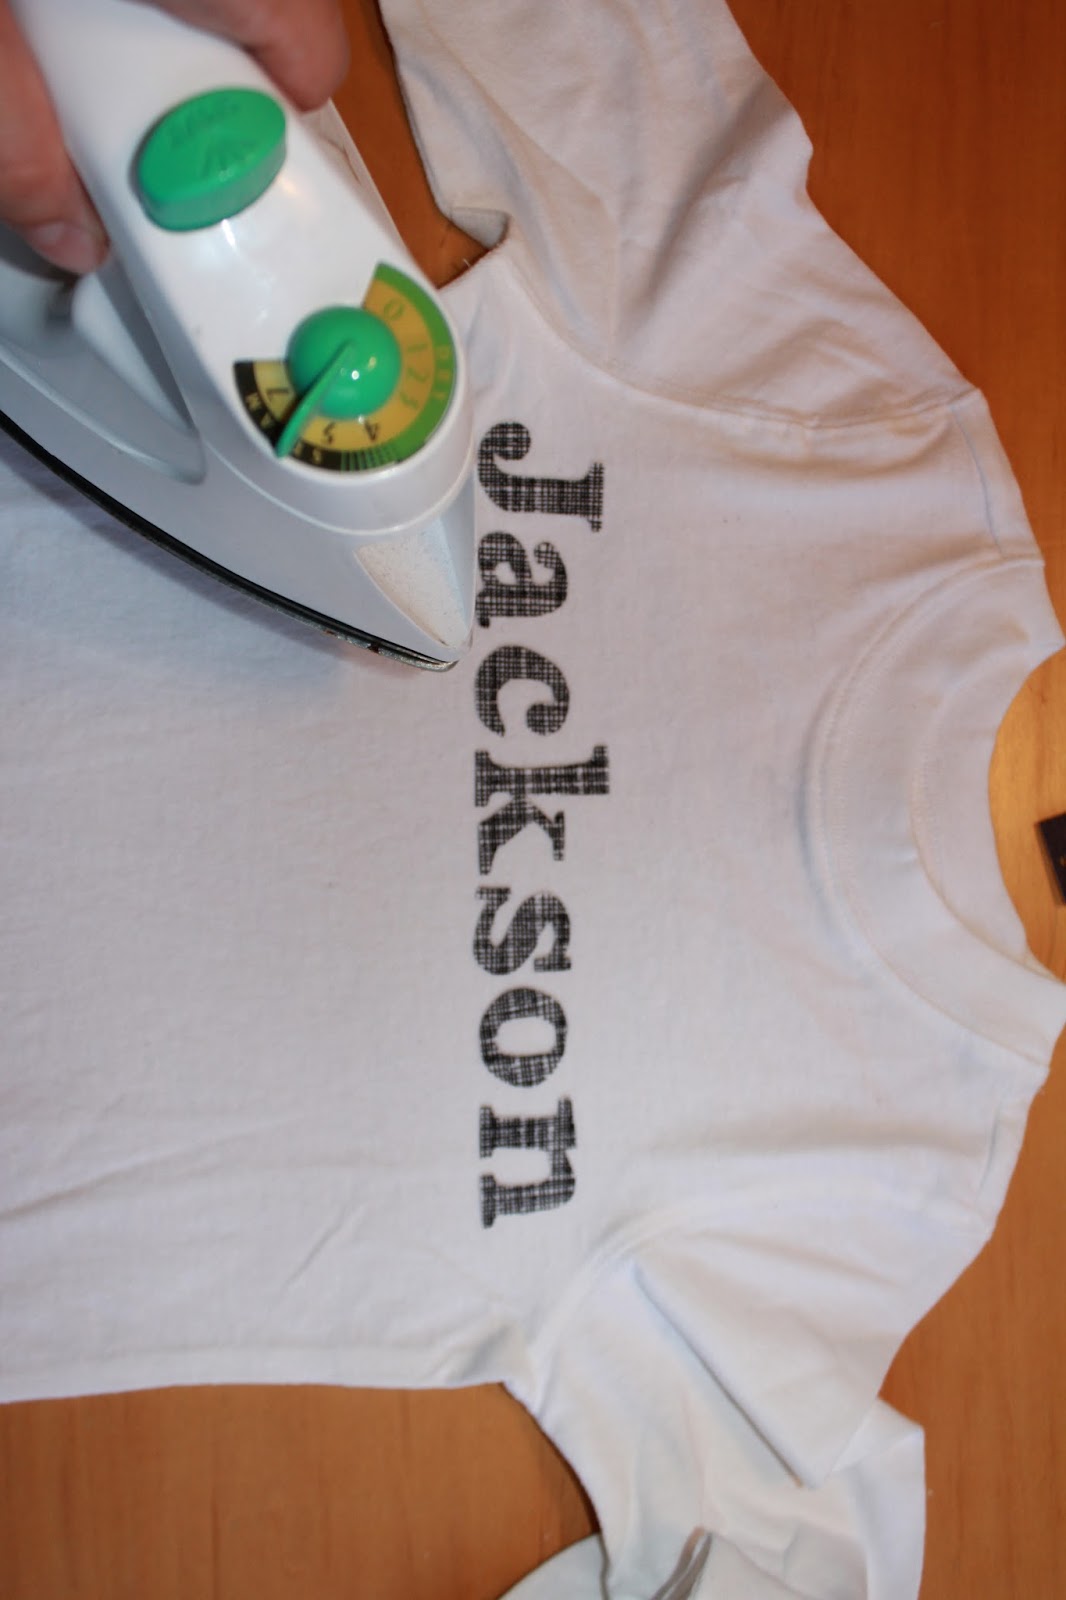
Step 7: Place your letters in the desired spot on your shirt, then iron them on.
Here is what my shirts looked like at this point. They look cute, but the adhesive won't stay permanently so you'll have to do a little bit of hand stitching at this point to anchor them on.
Step 8: Using embroidery thread that matches your fabric, tie a double square knot at the end of your thread.
Step 9: Begin on the outer edge of the first letter and pull your thread through about 1/8th of an inch away from the edge. Just enough to catch the fabric, with a little extra showing on the outside.